How Do You Draw a Baby Polar Bear
Polar bears can just be found throughout the Arctic region, thus it is less likely that we'll ever become to see i up close and personal unless you'll be traveling over to the north pole.
Why not draw an adorable polar bear instead? By learning how to draw one, you lot'll take your very own polar acquit right at your fingertips.
To make it a lot easier for you, nosotros have created a pace-by-pace process on how to draw a polar deport, summed upwardly in ix simple and easy steps.
Each instruction comes with illustrations that you can utilize as your visual guide, making the steps easier to follow. The best part? You can customize your cartoon and handpick the colors also!
Have fun and remember, the sky'southward the limit to your imagination!
What'south in this Blog Mail
- How to Draw a Polar Acquit — Allow's get started!
- Step 1
- Step 2 — Depict the Left Arm of the Polar Bear
- Step 3 — Complete the Polar Bear's Arms
- Step 4 — Draw the Left Side of the Lower Body
- Stride 5 — Finalize the Grade of the Lower Body
- Stride half dozen — Depict Both Legs of the Polar Bear
- Step 7 — Add Details All Over the Polar Behave
- Step viii — Next, Draw the Nose and the Mouth
- Step 9 — At present, Depict the Eyebrows and the Eyes
- Your Polar Behave Drawing is Complete!
How to Draw a Polar Bear — Let'south get started!
Step 1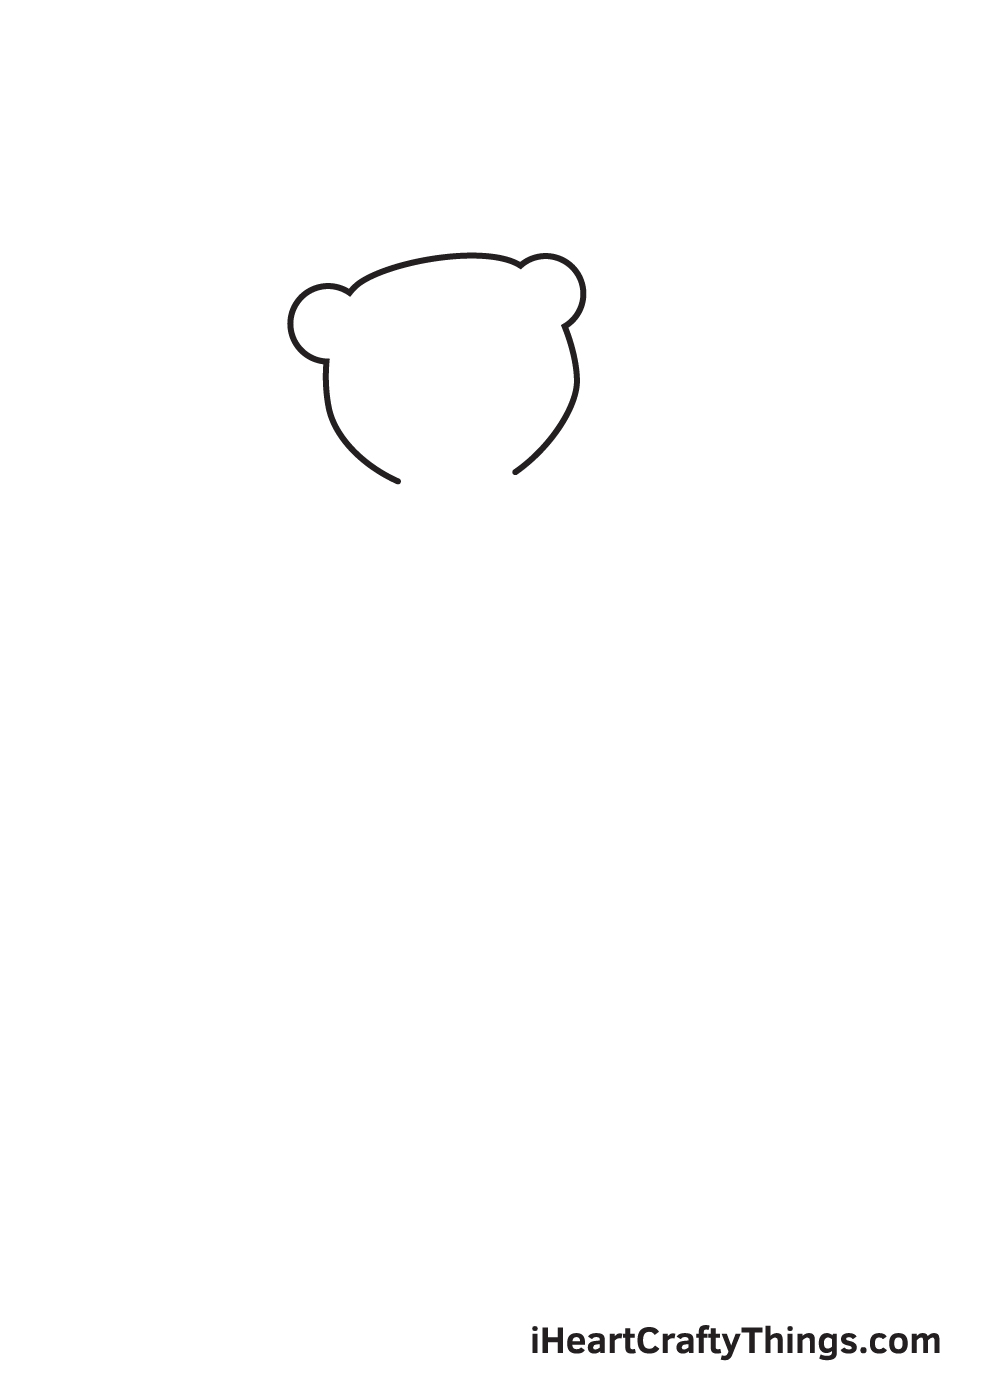
Brainstorm by cartoon an outline of the polar comport's head on the upper portion of your paper.
Y'all can create the caput of the polar acquit by simply drawing an irregular circle shape with two semicircles on each side in a higher place the caput forming the ears.
To ensure that the polar bear volition exist drawn in the center, you lot can create reference lines by drawing an intersecting vertical and horizontal line across your paper.
The vertical line in a higher place the horizontal line in the middle is where you should draw the caput of the polar carry. By doing this, yous will have sufficient space at the bottom for the entire body of the polar bear.
Stride ii — Draw the Left Arm of the Polar Bear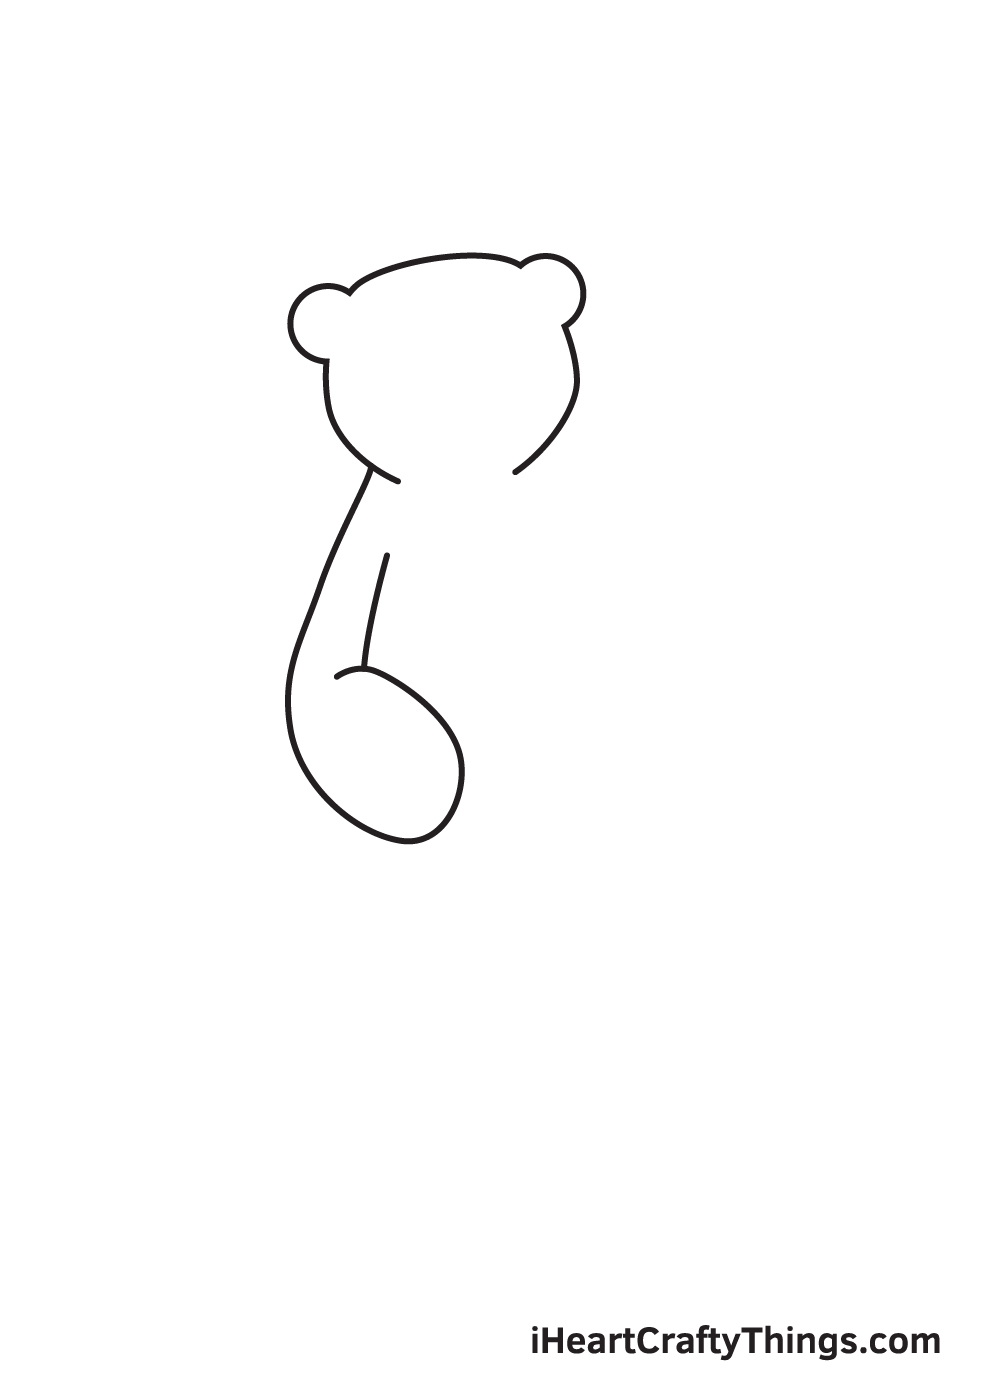
Draw an elongated curved shape underneath the polar comport'southward head to structure the arm. Make sure the arm is slightly angled, equally shown in the illustration.
Take note that the arm we'll be drawing in this step is the left arm, thus information technology should be on the left side of the polar behave.
Stride three — Complete the Polar Bear's Arms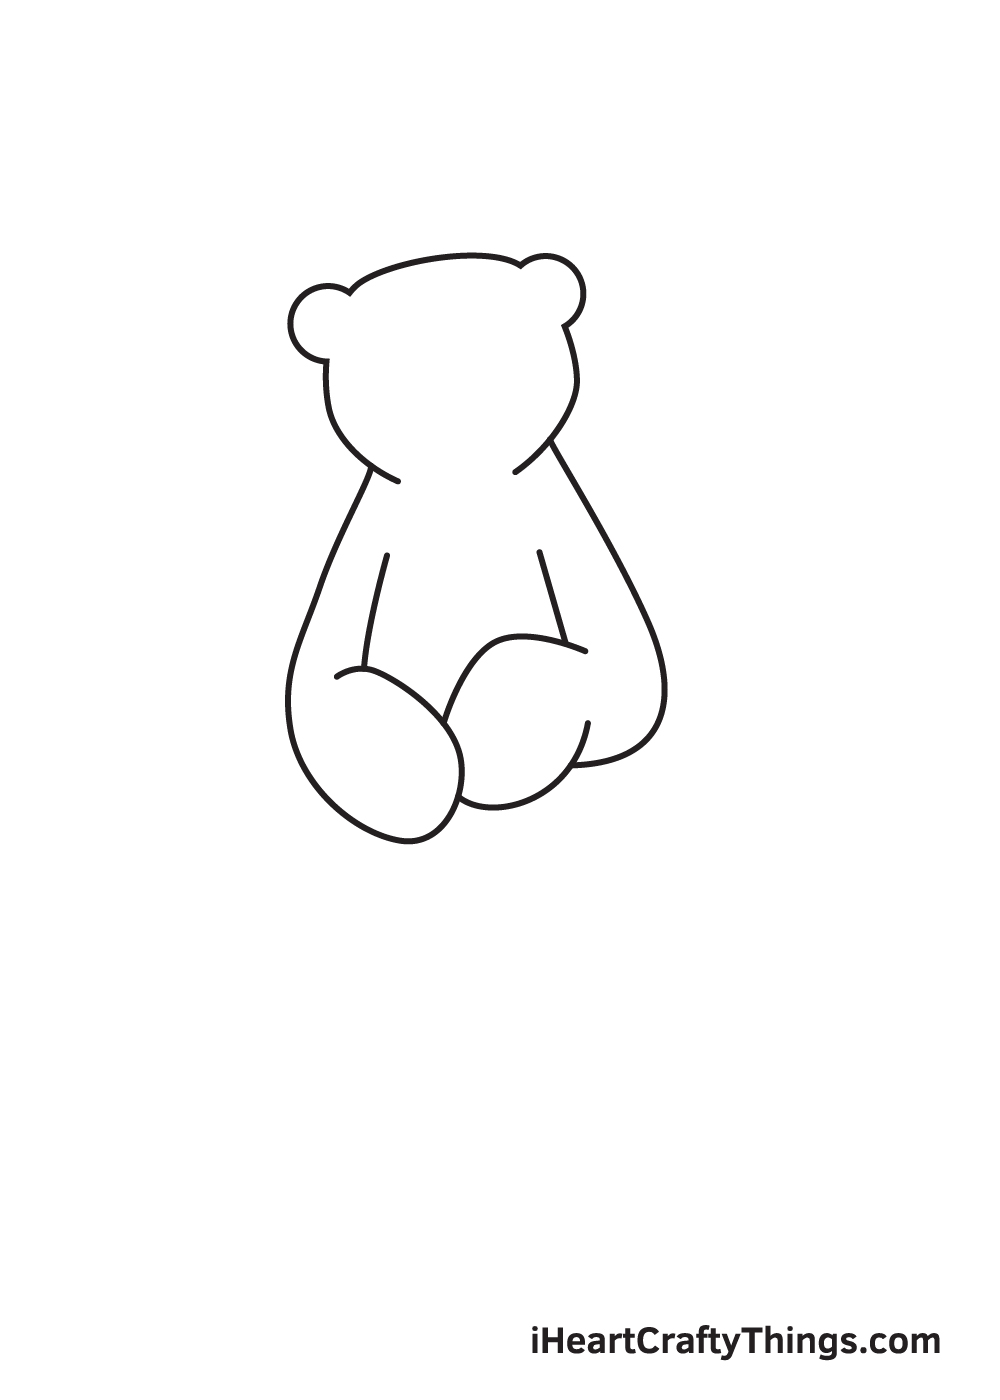
Depict an angled downwards line on the right side below the head of the polar bear to form the right arm.
So, draw a curved line that nearly forms an incomplete circle direct connected to the arm. This creates the hand, completing the right arm of the polar bear.
Afterwards completing this step, both arms of the polar bear should now be complete.
Step iv — Draw the Left Side of the Lower Body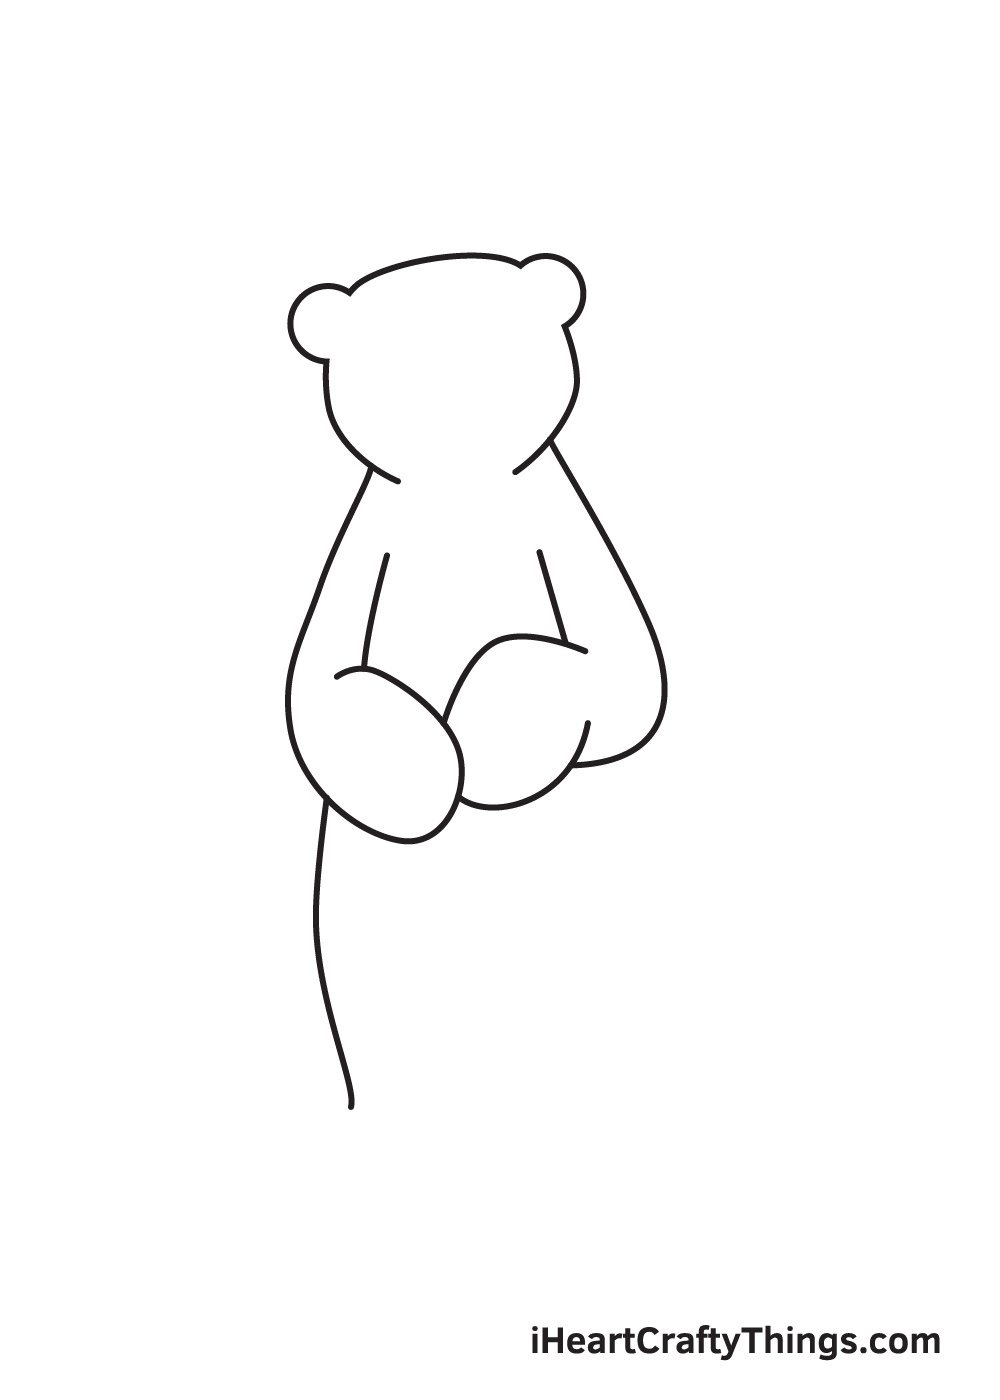
Continue by drawing a slightly curved line beneath the left arm to class the left side of the polar bear'due south lower body.
Step v — Finalize the Form of the Lower Body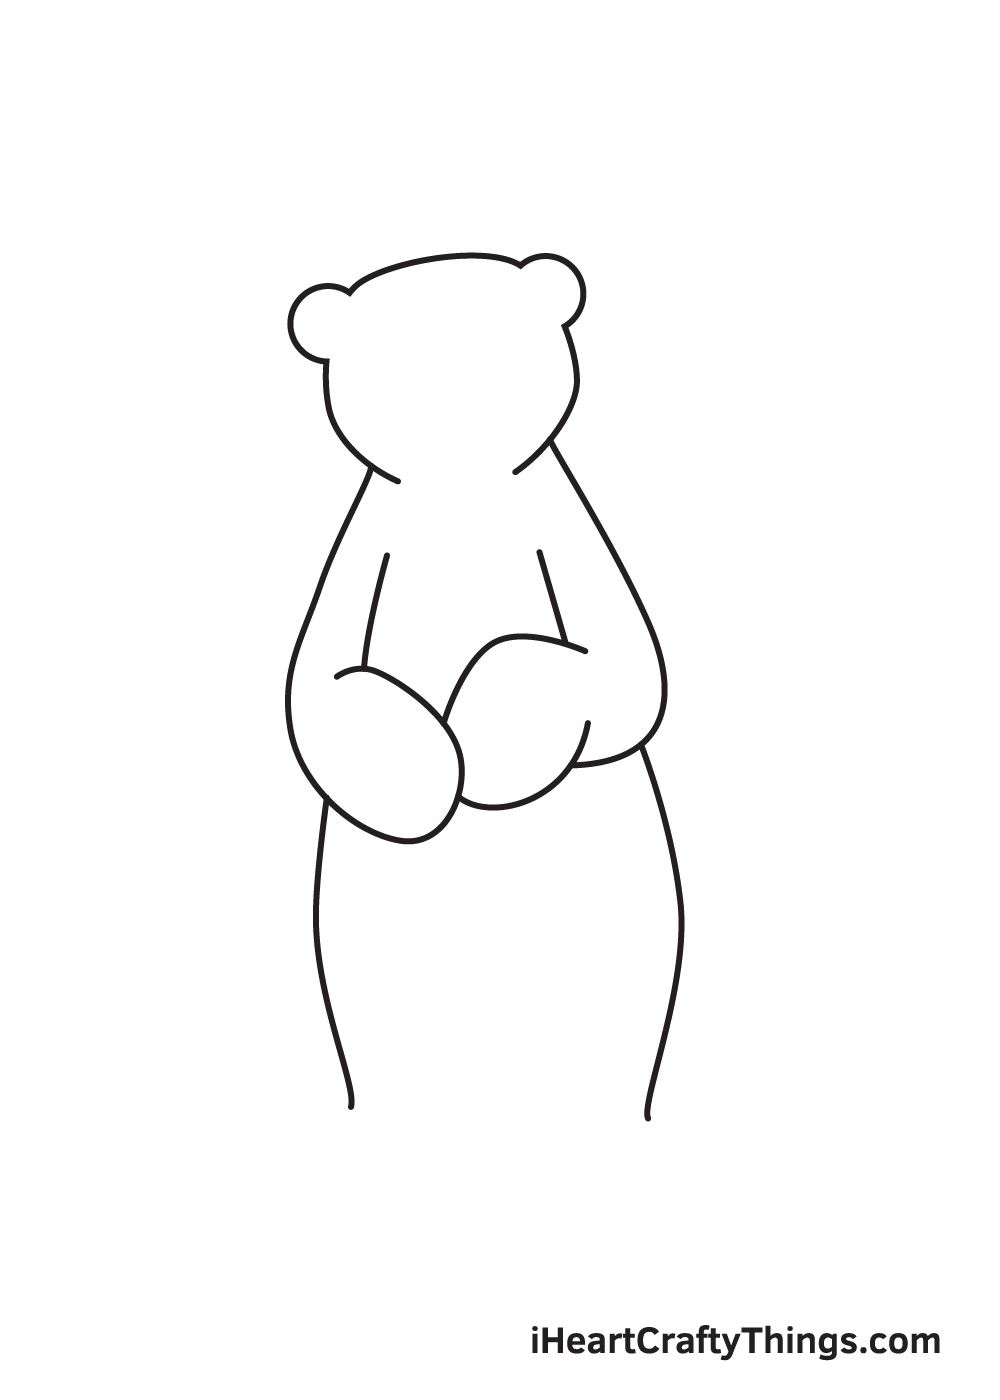
Repeat the previous step on the opposite side to complete the class of the lower trunk.
At this point, the lower torso should be fully structured. Now, all the body is missing are the legs, which is what we'll exist working on on the side by side step.
Footstep vi — Draw Both Legs of the Polar Bear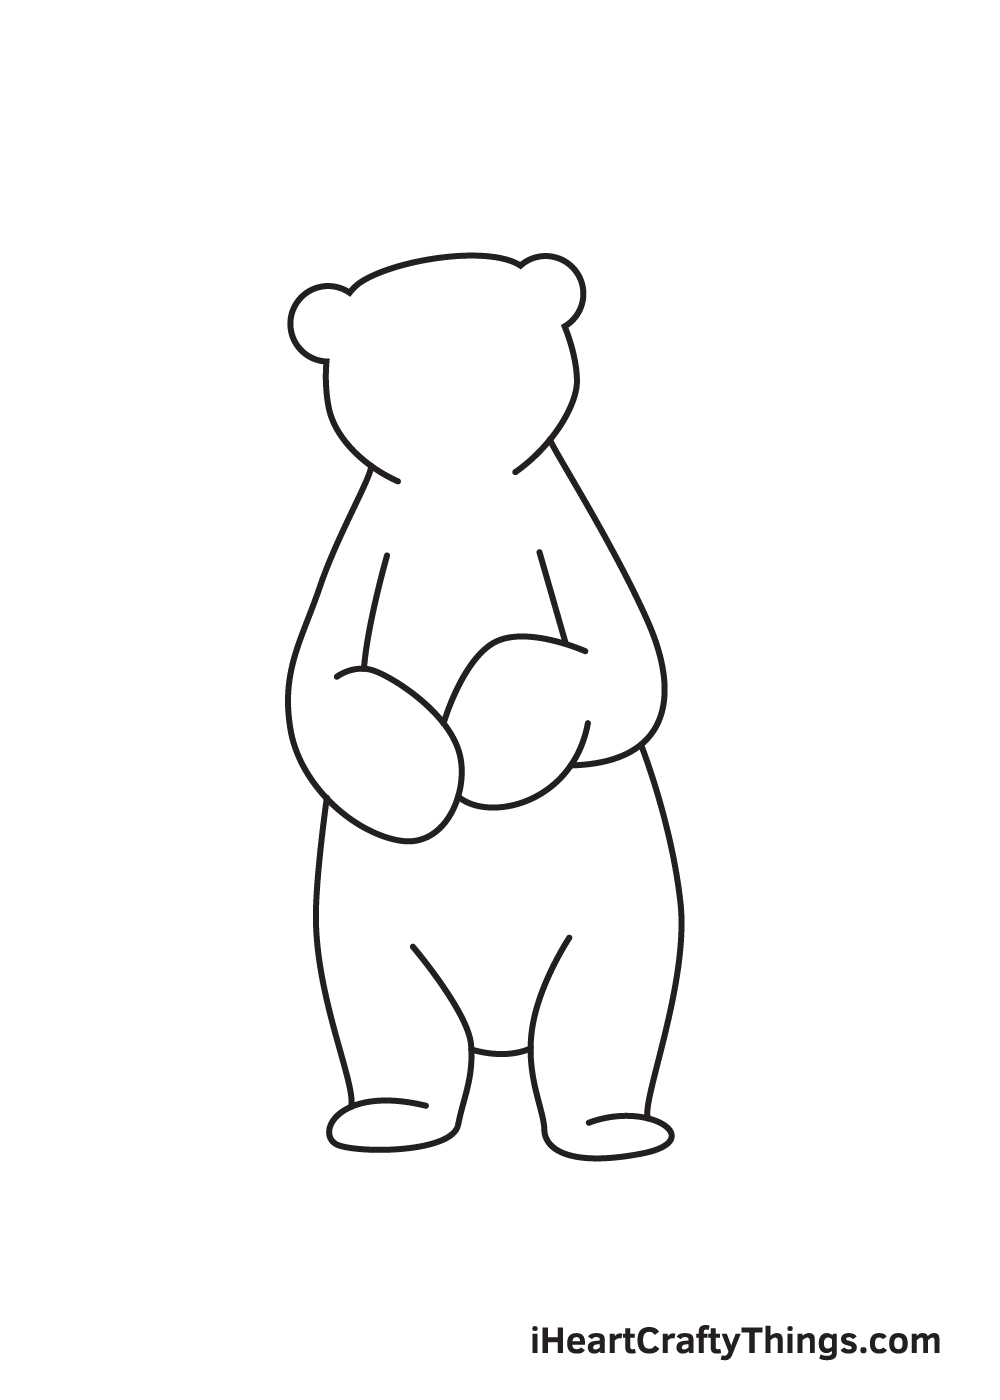
Draw a brusk curved line facing opposite directions in the middle of the lesser of the polar bear's lower body.
This creates both legs of the polar bear. Now, to create both feet, draw some other line forming a sideways oval shape at the bottom of each leg.
Keep in heed that the anxiety of the polar bear should be facing opposite directions, every bit shown in the illustration above.
Step 7 — Add Details All Over the Polar Bear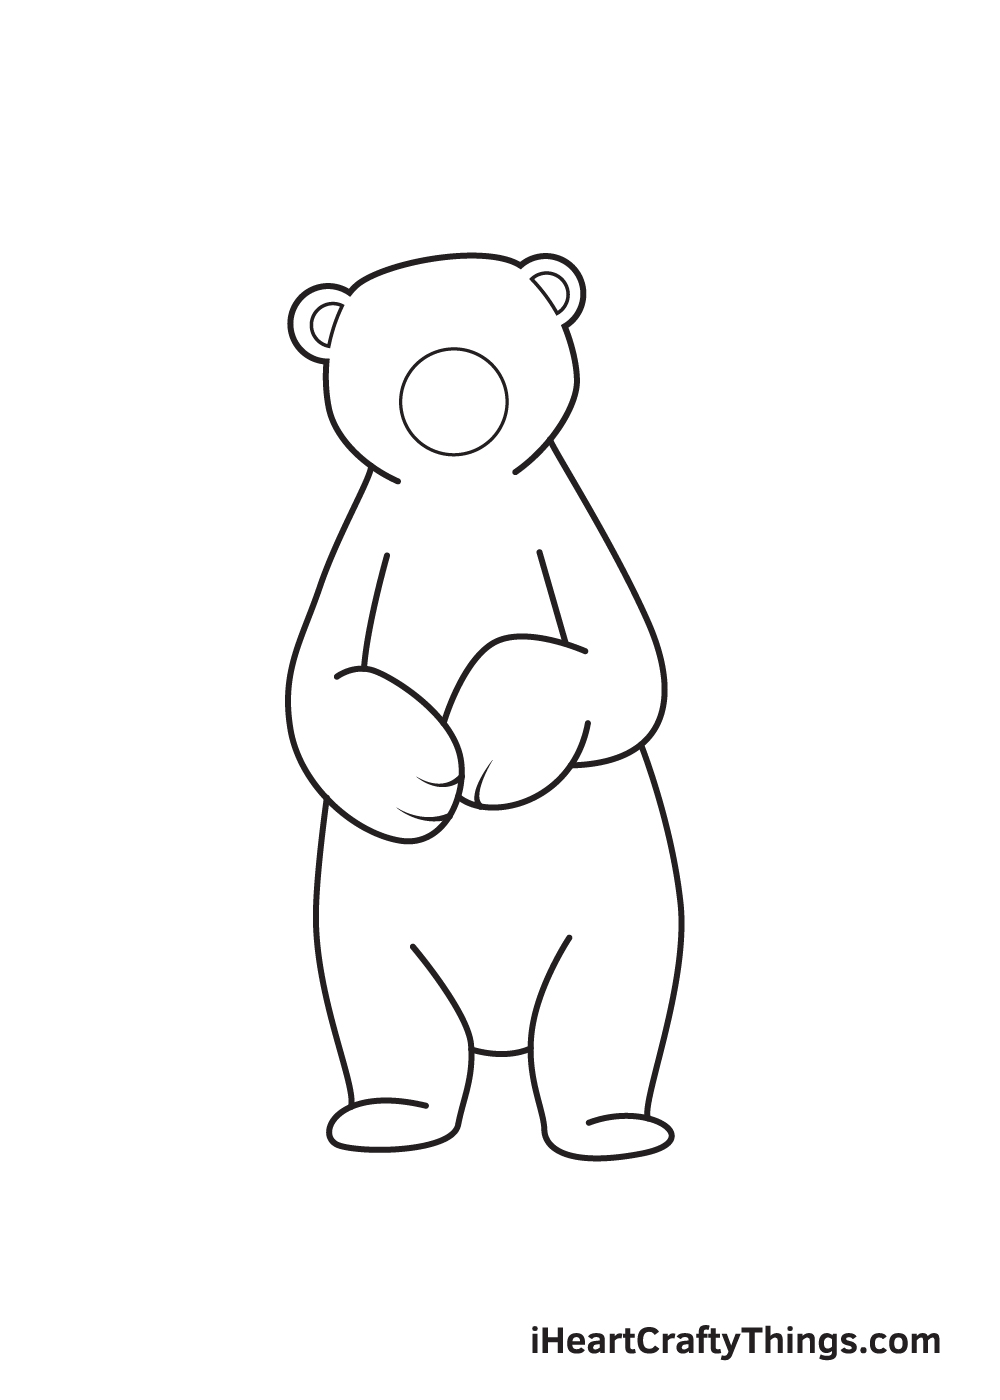
In this step, nosotros will now exist drawing the details and patterns all over the trunk of the polar acquit. This helps brand your polar acquit wait realistic.
Starting from the top to the bottom, proceed by cartoon a shape within each ear following its original outline.
This creates the inside ears. Then, draw a small-scale circle shape within the face up of the polar bear, highlighting its snout. Lastly, small curved lines on its hands to create the appearance of paws.
Stride 8 — Next, Draw the Nose and the Mouth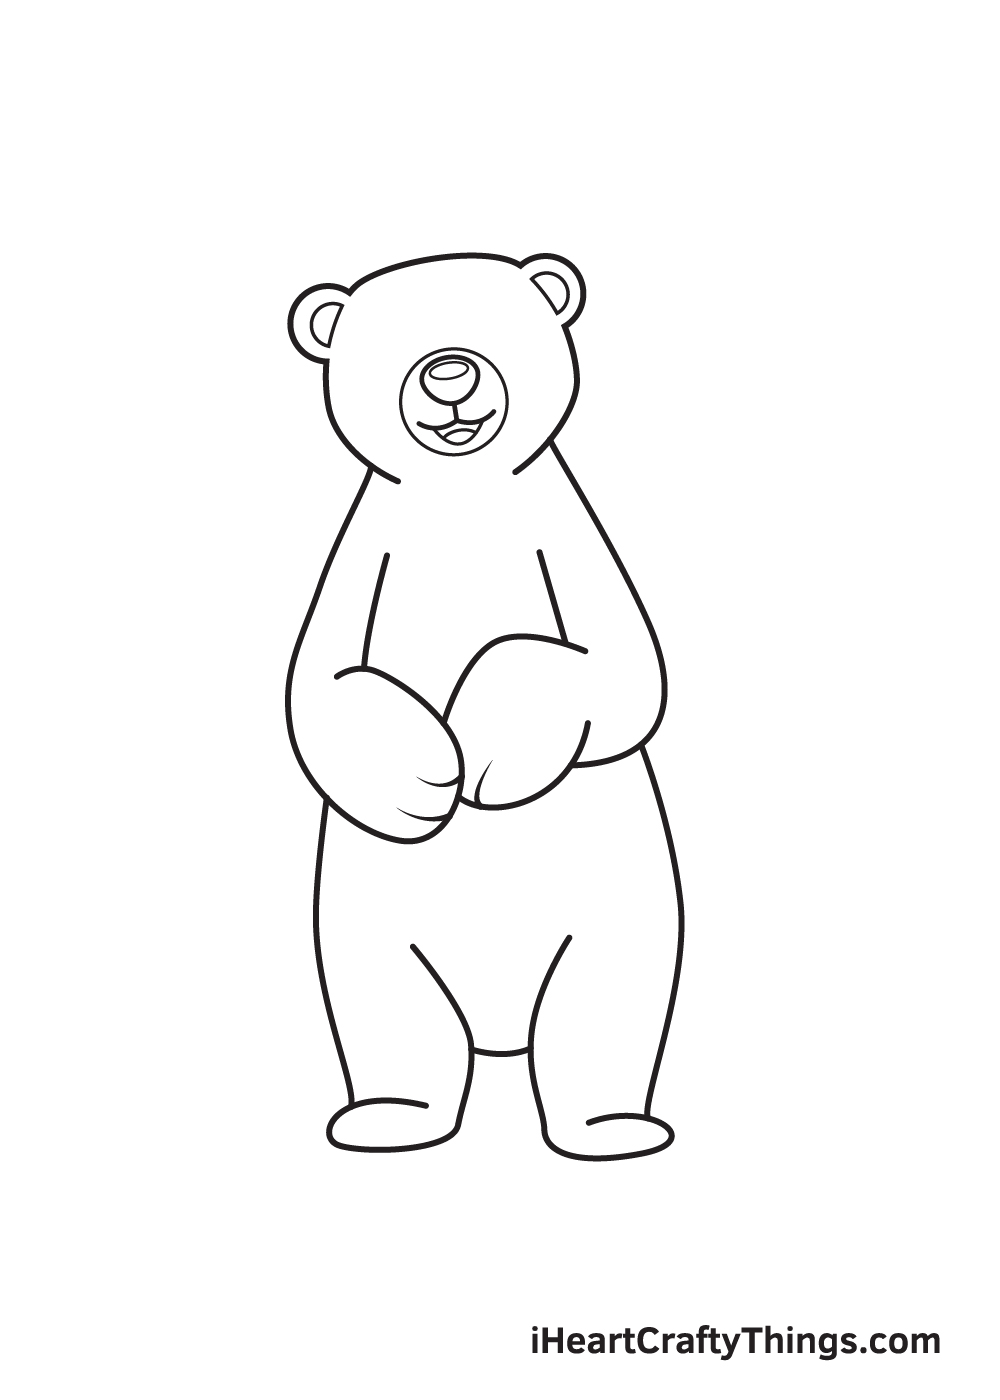
Moving on to the facial features of the polar deport, go along by drawing an irregular circle shape for the olfactory organ. Then, draw a small sideways oval shape inside the olfactory organ.
Later, two connected curved lines below the nose. Then, draw a curved line right underneath to form the oral fissure. Don't forget to add a curved line inside the mouth to form the natural language of the polar bear!
Pace 9 — Now, Describe the Eyebrows and the Eyes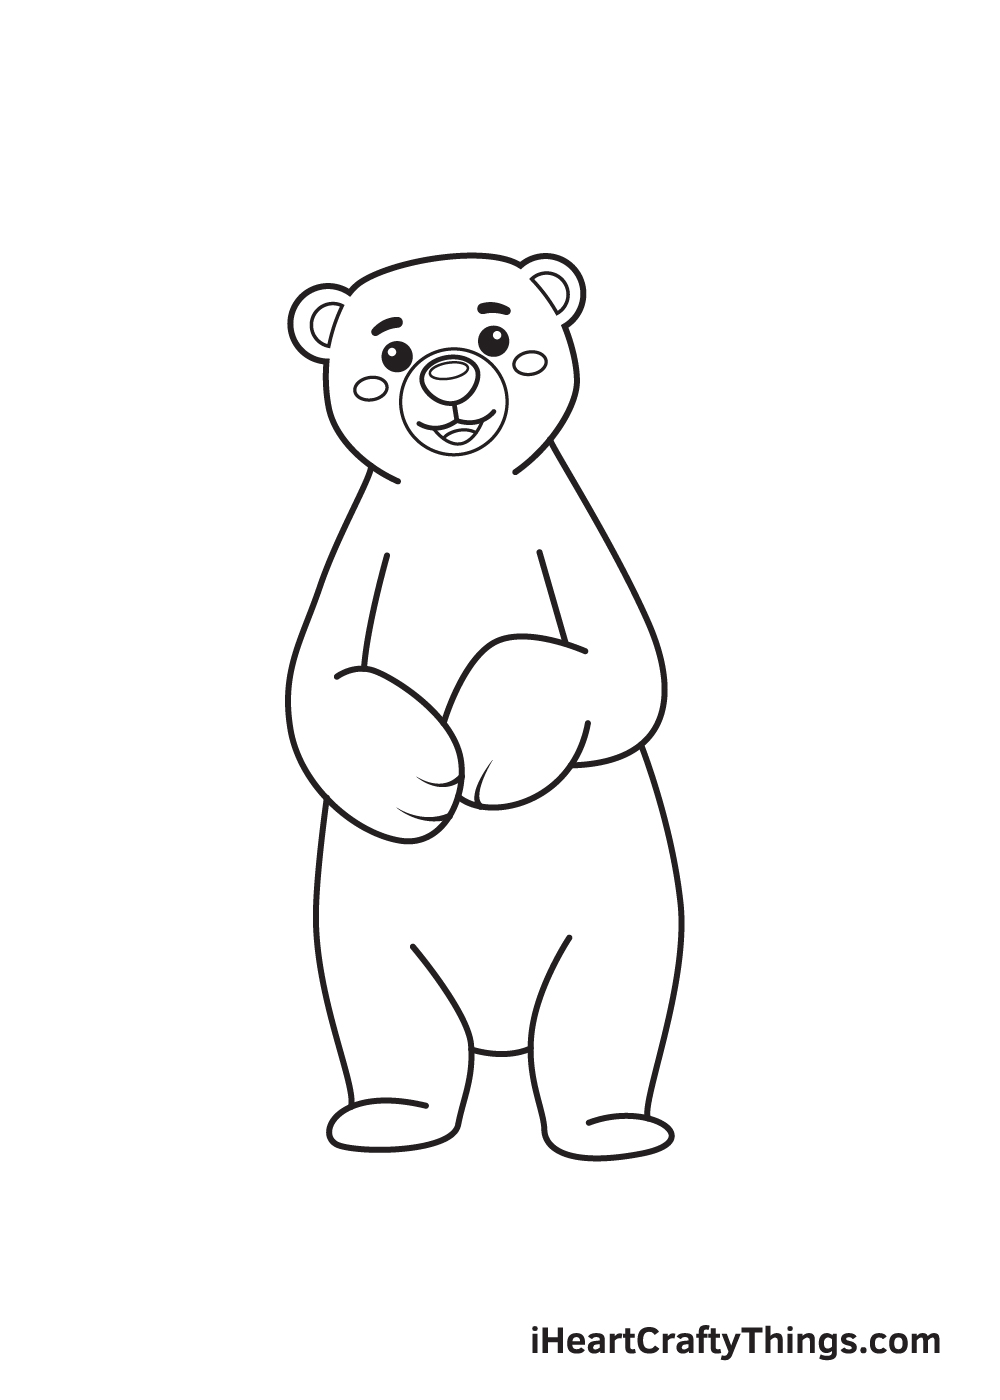
Complete the look by creating the eyes and the eyebrows. Describe two brusque curved lines forming the arched eyebrows. Make sure that the eyebrows are thick and aligned to each other.
Then, draw a circle shape underneath each eyebrow to create the eyes. Now, add shade to the eyes while leaving out a tiny dot unshaded to brand the eyes announced like it'south glimmering!
For an extra dramatic effect, depict a sideways oval shape on both cheeks. This makes your polar conduct'south cheeks look flushed—so ambrosial!
Now that we've successfully fatigued a polar deport, it's finally fourth dimension for the most exciting part, which is choosing the colors and coloring the polar bear.
As we all know, polar bears are predominantly white in color, which enables them to camouflage into their snowy environment effortlessly.
But did y'all know that the polar bear's glaze has no white pigment? As a matter of fact, the skin of the polar bear is black and its fur is actually transparent.
Yous tin opt to color the polar bear with its original white color or use a unique set of colors. Either style, we're sure the colors will plow out beautifully!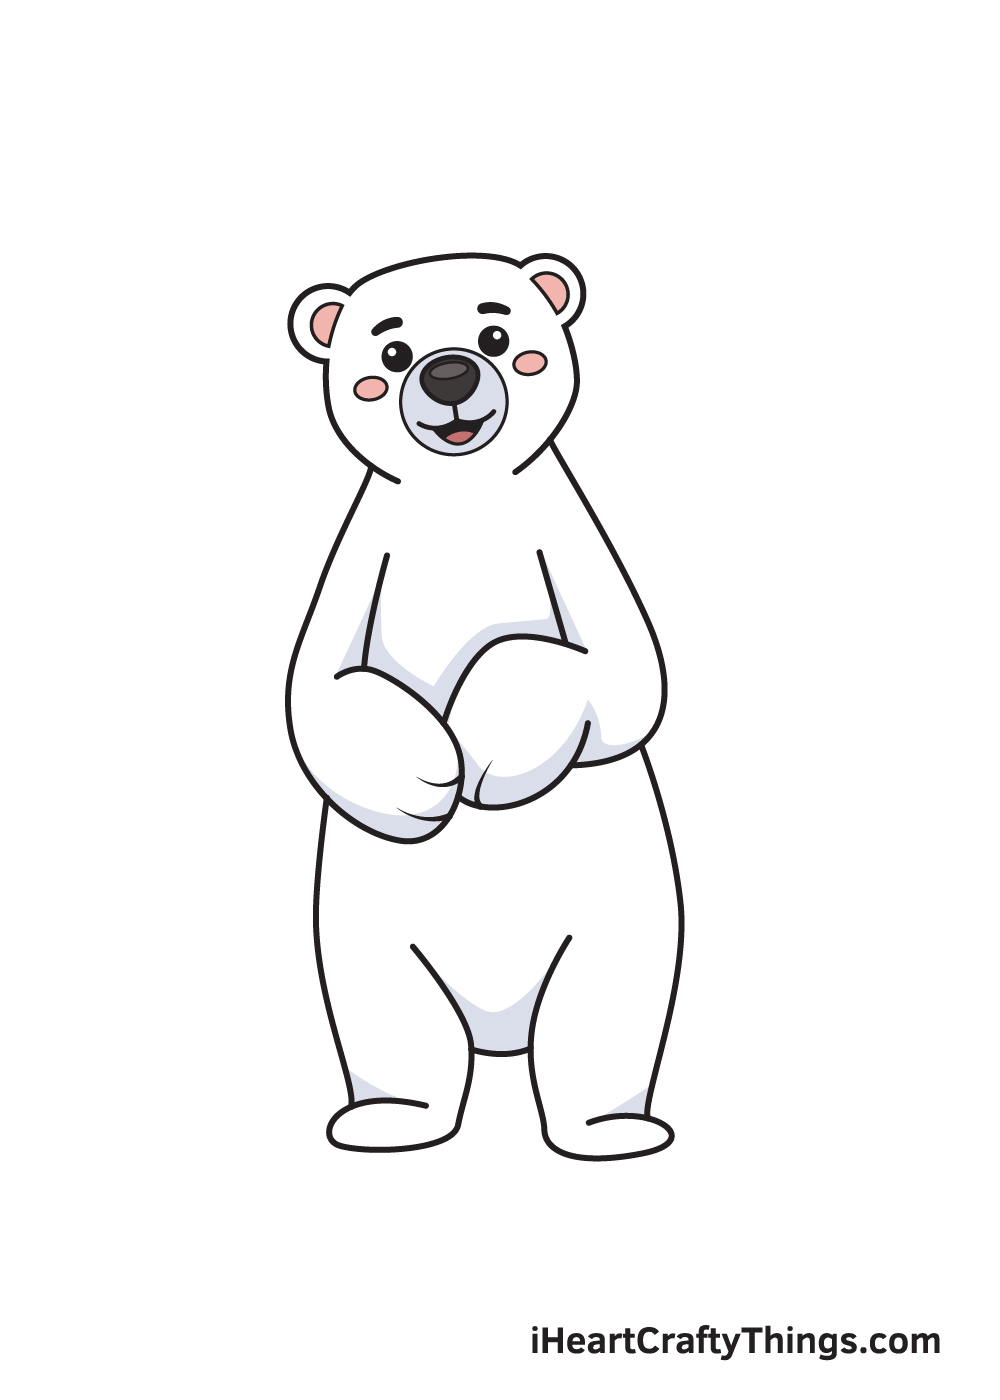
Your Polar Bear Cartoon is Complete!
If you had fun with this step-past-pace polar behave drawing tutorial, and so you'll certainly enjoy other drawing tutorials of other animals such as an elephant, bunny, and more! Check out our "How to Draw" catalog and cull what you lot would similar to learn how to depict next!
Every bit before long as you finish drawing and coloring your polar conduct, don't recollect twice about showing off your masterpiece!
Take a photograph of your artwork and share it on various social media platforms. And while you're at it, make sure you similar our Facebook page also!
Nosotros're looking forward to seeing your incredible polar bear drawing!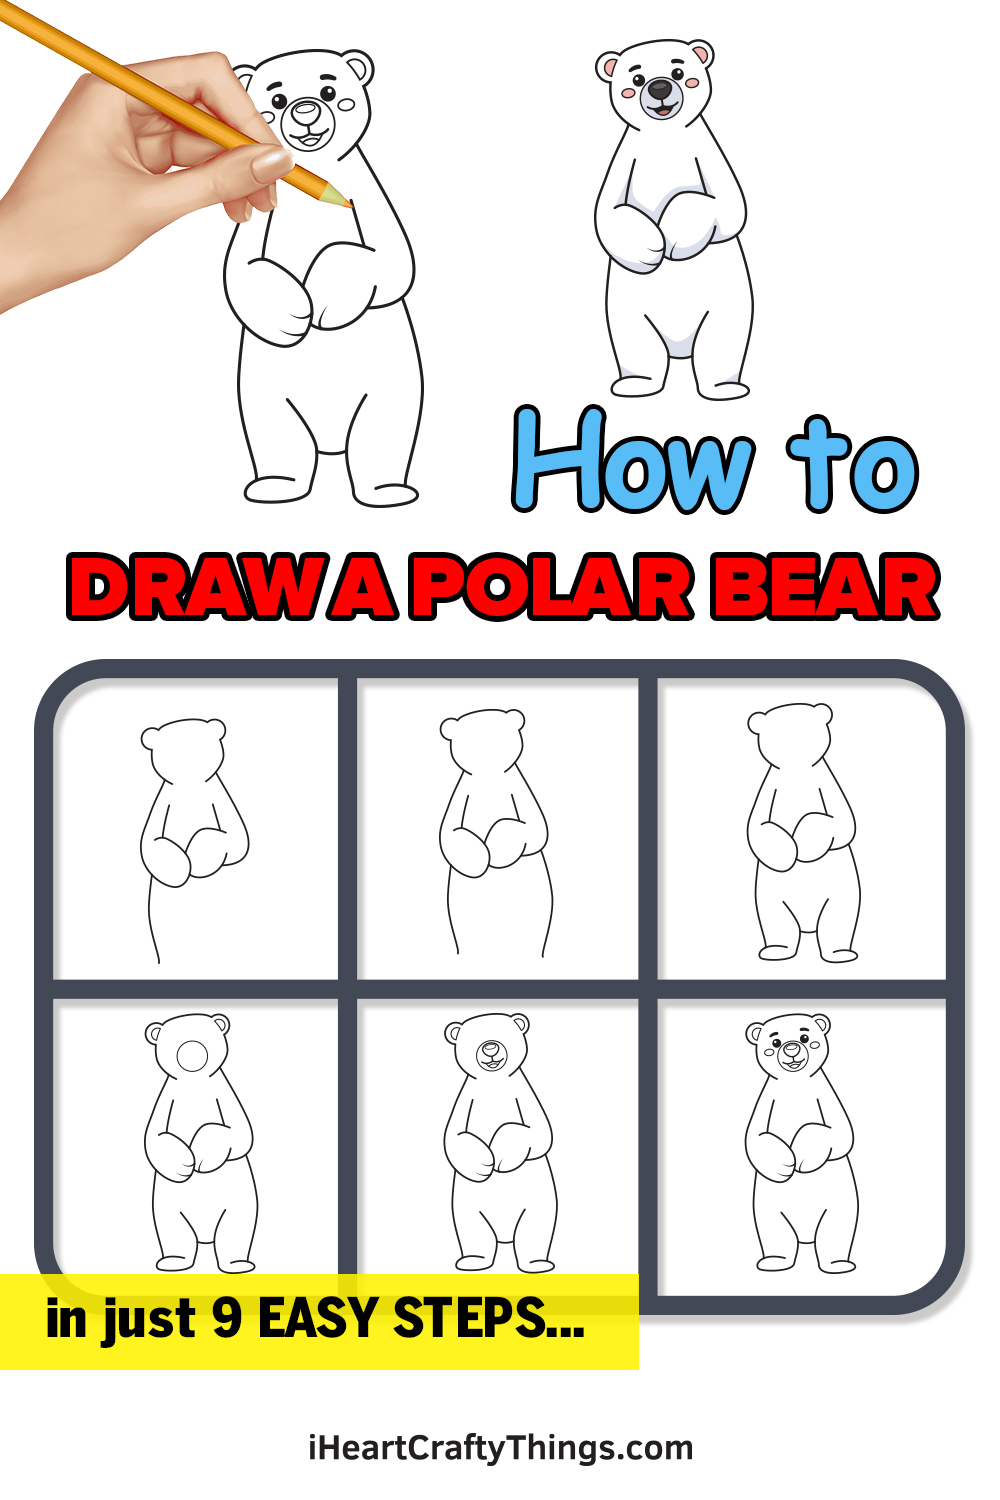
Source: https://iheartcraftythings.com/polar-bear-drawing.html
0 Response to "How Do You Draw a Baby Polar Bear"
Post a Comment